

Empty glass jars pile up in recycling bins every week. Repurposing these durable containers reduces household waste while adding custom architectural elements to your space. Implementing high-quality upcycled mason jar decor requires exact preparation and the right materials to ensure a professional, lasting finish.
This guide outlines precise methods to convert standard glass containers into functional home accessories. You will learn exact cleaning protocols, paint application techniques, and hardware mounting requirements.
Review the material specifications and time commitments below before starting your first build.
Glass Paint Adhesion Guide
Applying the wrong coating directly to slick glass results in immediate peeling. Use this reference table to select the correct primer and paint combination for your specific project environment.
| Finish Type | Recommended Primer | Best Topcoat | Cure Time | Washability |
| Rustic / Distressed | Spray Bonding Primer | Matte Chalk Paint | 24 hours | Wipe gently |
| Sleek Metallic | None Required | Rust-Oleum Metallic Spray | 48 hours | Spot clean |
| Translucent Tint | Clear Glass Medium | Mod Podge + Food Coloring | 12 hours | Not washable |
| Opaque Gloss | Oil-Based Primer | High-Gloss Enamel | 72 hours | Hand wash safe |
Clean and Prep the Glass Surface
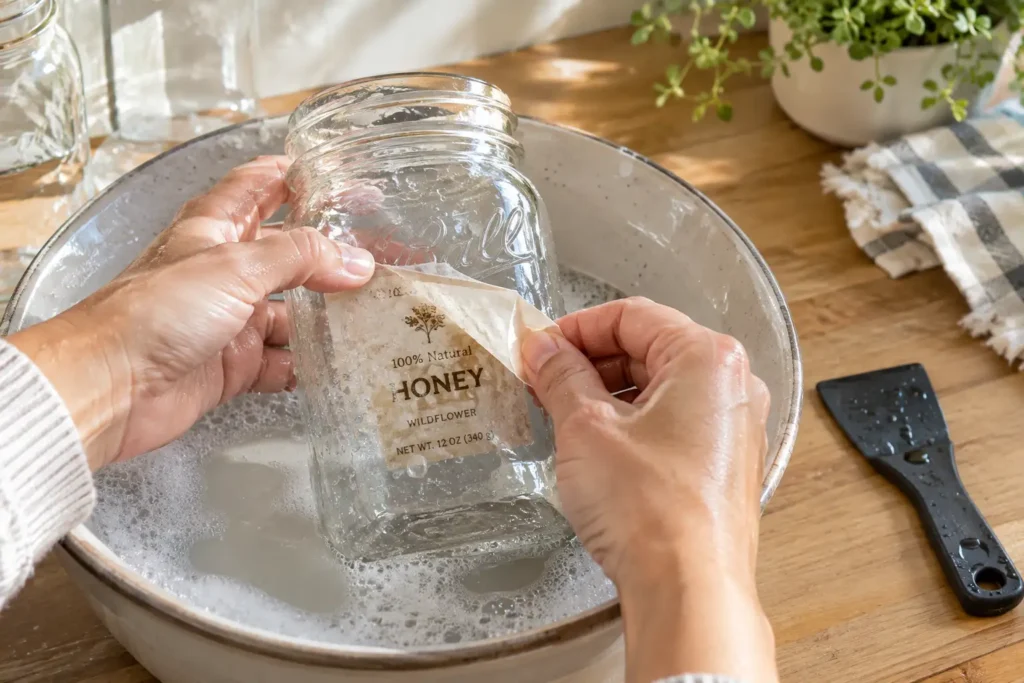
Removing factory adhesive dictates the success of your entire project. Soak the jars in a basin filled with hot water and 2 tablespoons of dish soap for exactly 30 minutes. Scrape away the paper labels using a plastic putty knife to avoid scratching the underlying glass.
Wipe the exterior with heavy-duty rubbing alcohol to remove residual grease and fingerprints. This exact cleaning protocol guarantees that your primer and paint adhere permanently to the slick surface, preventing premature peeling.
Paint and Distress for a Farmhouse Look
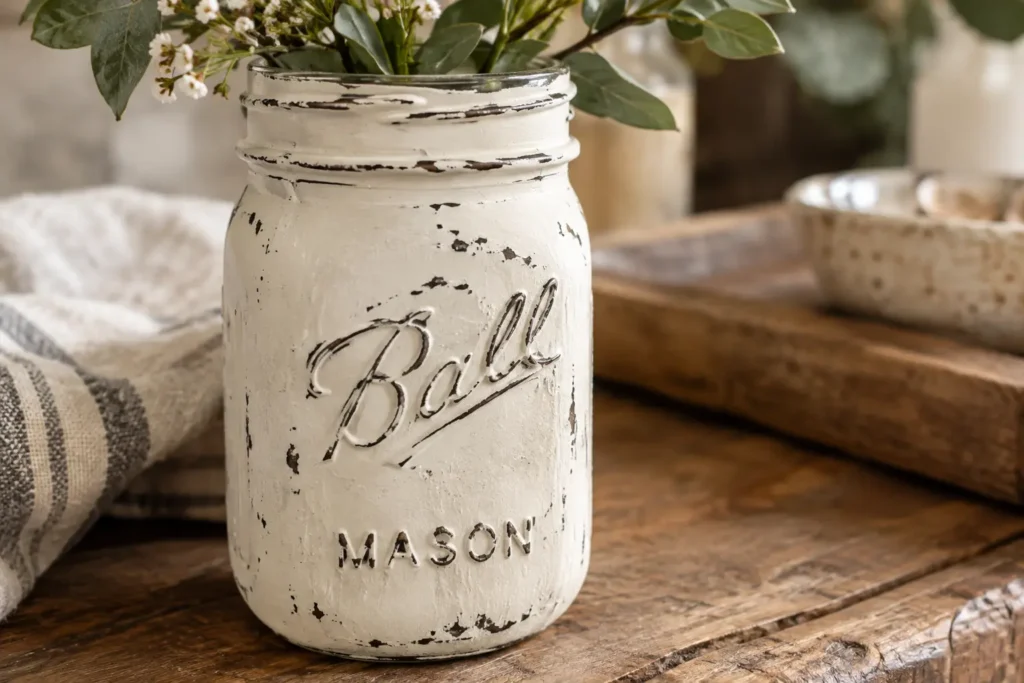
Standard acrylic paint slides right off bare glass without a chemical anchor. Apply a high-adhesion bonding primer first, spraying in light, even coats from a distance of 12 inches. Wait 24 hours for the primer to cure completely before applying your topcoat.
Brush on 2 coats of matte chalk paint to build a thick, opaque layer that hides the primer. Once dry, rub a piece of 120-grit sandpaper gently over the raised lettering and the top rim. This distressing technique exposes the glass underneath, creating an aged, vintage aesthetic perfect for upcycled mason jar decor.
Mount Hardware for Wall Organizers
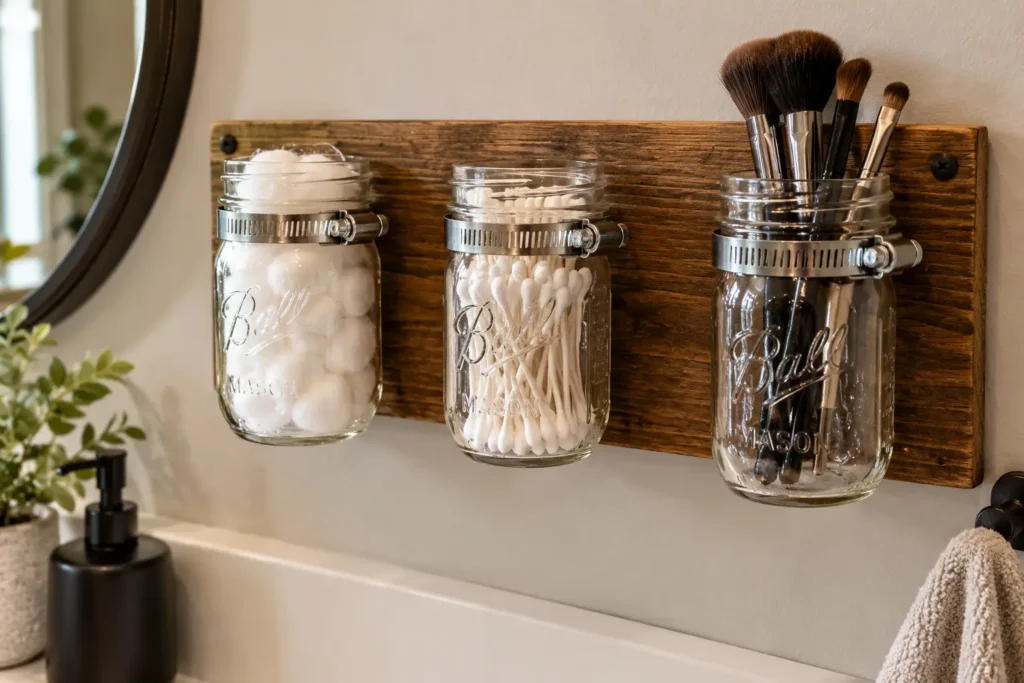
Clear off your bathroom counter or office desk by moving storage directly to the wall. Purchase a 1×4-inch pine board cut to a 24-inch length and stain it to match your room’s flooring or trim.
Secure the glass containers to the wood using these specific steps:
- Mark 3 evenly spaced points across the wooden board using a measuring tape.
- Drill pilot holes through the metal center of 3 hose clamps using a titanium drill bit.
- Drive a 1/2-inch wood screw through each clamp directly into the pine board.
- Slide the jar necks into the metal rings and tighten the side screws with a flathead screwdriver until the glass is completely secure.
Pour Custom Candles into Clean Jars
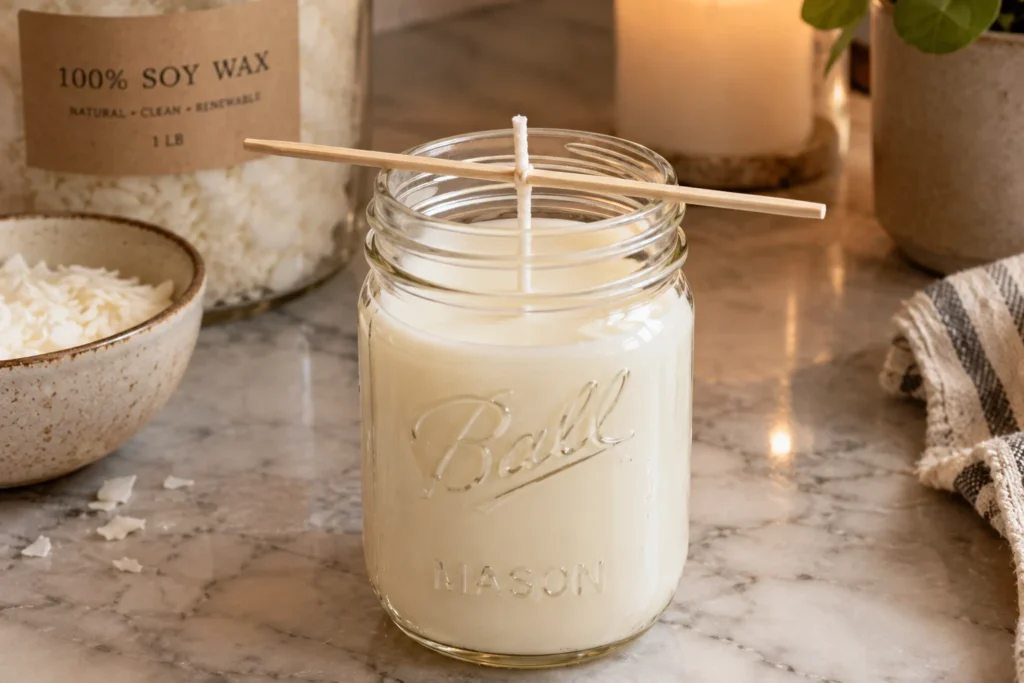
Thick canning jars withstand high temperatures safely, making them ideal vessels for homemade candles. Secure a pre-waxed cotton wick to the inside bottom of the jar using a hot glue gun. Tie the top of the wick around a wooden skewer resting across the jar opening to keep it perfectly centered during the pour.
Melt 1 pound of soy wax flakes in a double boiler until the liquid reaches 185°F. Remove the wax from the heat and stir in exactly 1 ounce of essential oil for fragrance. Pour the hot wax slowly into the container and let it cure at room temperature for 48 hours before trimming the wick to a 1/4-inch length.
Build a Suspended Indoor Herb Garden
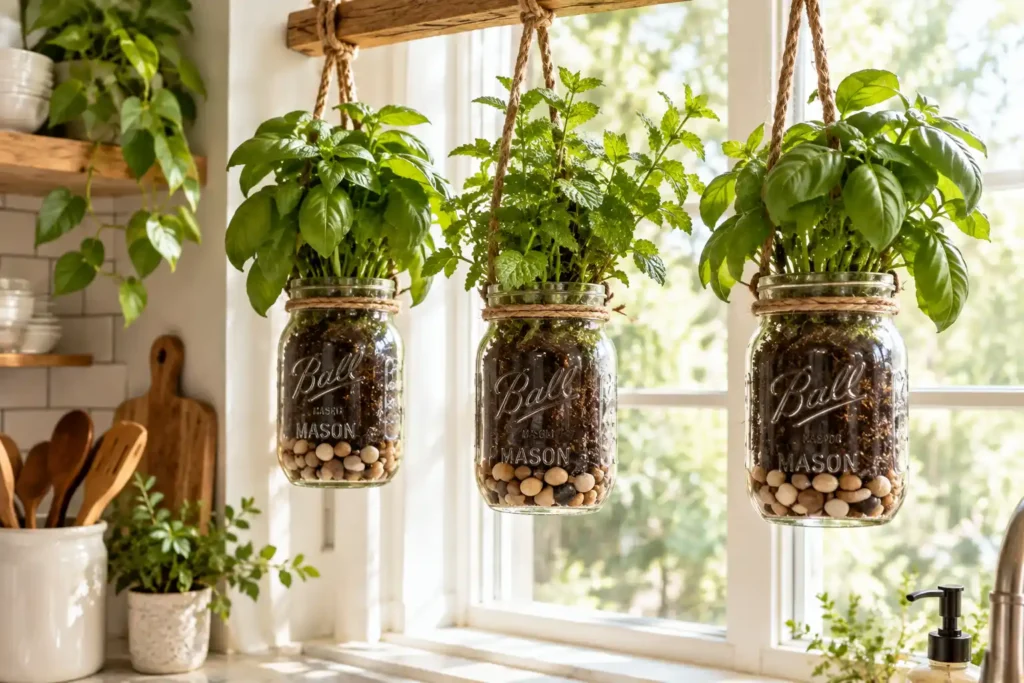
Bring fresh herbs into your kitchen by hanging a tiered planter system in front of a sunny window. Wrap thick jute twine tightly around the threaded neck of 3 identically sized jars. Tie heavy square knots on opposite sides to create a balanced hanging loop for each vessel.
Fill the bottom 1.5 inches of each jar with small river rocks to establish a necessary drainage layer. Add organic potting soil and plant your basil, mint, or thyme directly into the glass. Suspend the jars from a metal tension rod mounted inside the window frame to catch maximum morning sunlight.
Wire Jars for Industrial Pendant Lighting
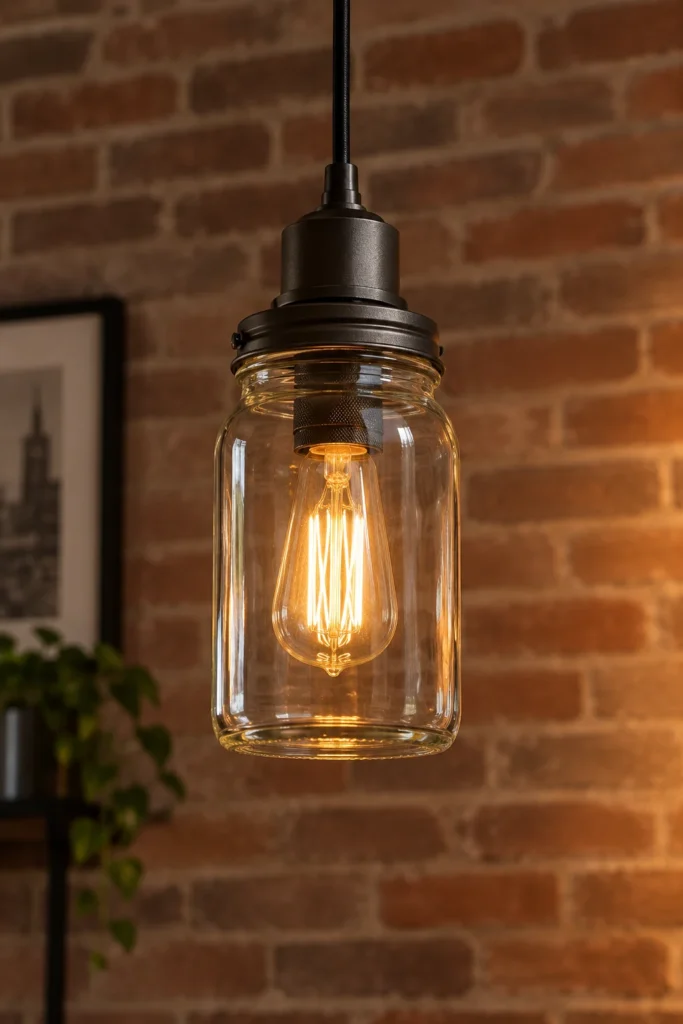
Glass containers make excellent transparent shades for vintage Edison bulbs. Trace the outline of a pendant light socket onto the center of a metal jar lid. Drill a pilot hole, then use tin snips to cut out the traced circle, wearing heavy leather gloves to protect your hands from the sharp metal edges.
Thread the pendant light socket through the cut hole and secure it using the socket’s threaded collar. Insert a 40-watt vintage-style LED bulb before screwing the lid back onto the jar. Hang the fixture from the ceiling to create an instant industrial lighting feature.
Construct a Matching Bathroom Vanity Set
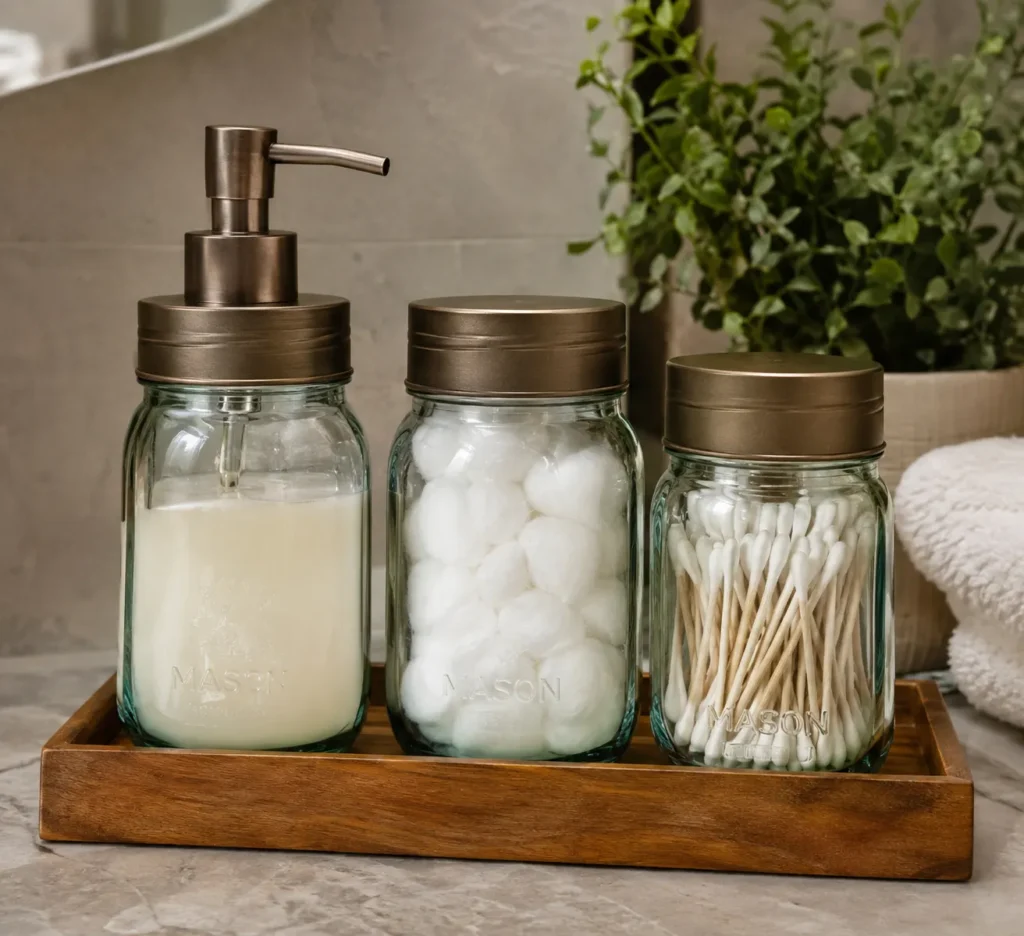
Coordinate your bathroom storage by creating a unified accessory set from mismatched recycled glass. Select a 32-ounce jar for tall items like makeup brushes and a shorter 16-ounce jar for cotton swabs. Drill a hole through the lid of a third jar and insert a stainless steel soap pump, securing the underside of the pump with heavy-duty epoxy.
Paint all three lids using a metallic rust-oleum spray paint for a cohesive, factory-finished look. Grouping these functional pieces together on a wooden tray provides high-end upcycled mason jar decor at a fraction of boutique retail pricing.
Conclusion
Stop throwing away durable glass containers that possess incredible structural integrity. You now possess the exact techniques required to strip stubborn adhesives, apply permanent paint, and assemble functional fixtures. Gather your empty jars and order your mounting hardware online to begin your first project this weekend. Executing these upcycled mason jar decor concepts builds sustainable, custom accessories that rival expensive boutique housewares for pennies on the dollar.
FAQ
Do I need to sand the glass before painting it?
No, sanding glass is dangerous and ineffective. Instead, wipe the surface with 90% isopropyl alcohol to strip all oils, then apply a specialized bonding primer designed specifically for slick, non-porous surfaces.
How do I cut large glass jars in half safely?
Score a straight line around the jar using a specialized glass cutter tool. Alternate pouring boiling water and freezing cold water directly over the score line for 3 to 5 minutes until the glass snaps cleanly along the stress point.
Can I put painted mason jars in the dishwasher?
No. Even fully cured chalk paint and enamel will chip or wash off entirely under the high heat and heavy water pressure of a dishwasher cycle. Always wipe painted glass clean with a damp microfiber cloth.
What is the best way to permanently seal the paint?
Apply a non-yellowing, water-based polycrylic sealer over your dried paint. Brush on 2 thin coats, waiting exactly 2 hours between applications. This creates a hard, protective shell against daily wear and moisture.